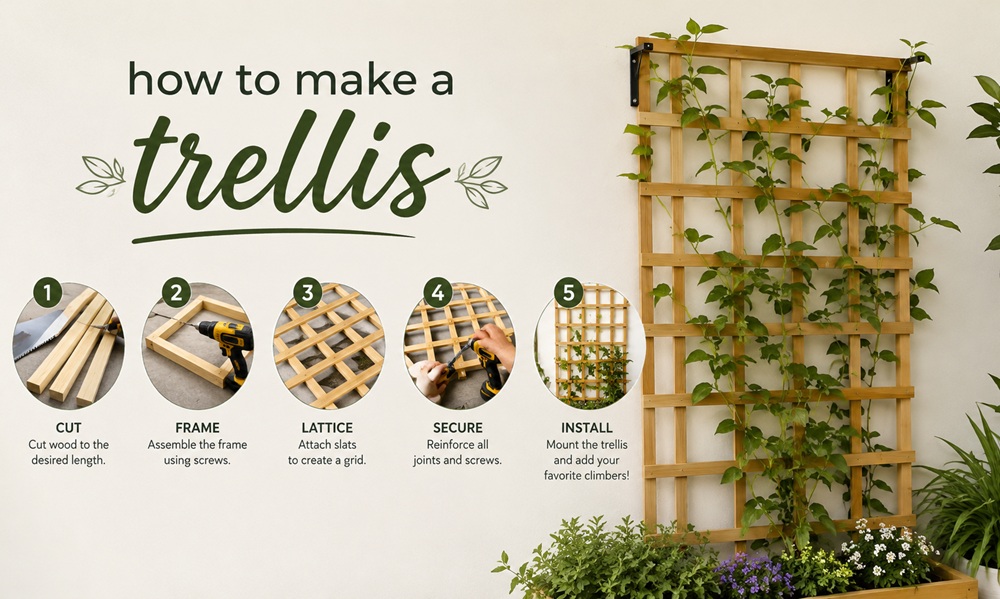
A trellis is just a frame that gives climbing plants something to hold on to. You can make one in an afternoon with a few boards and a box of screws, or in under an hour with bamboo canes and a ball of twine. The right way to make a trellis depends on what you’re growing, how much weight it needs to carry, and where it will stand.
Below are three builds that cover most garden situations. The first is a sturdy wooden ladder trellis, the second is a quick bamboo teepee, and the third is a wire trellis that runs along a wall or fence. Pick the one that matches your plants and your patience.
A Few Decisions Before You Start
Think about the plant first. Peas and sweet peas are light and happy on thin supports. Pole beans and cucumbers need something a bit stronger. Heavy climbers such as grapes, wisteria, and mature clematis put real load on a frame, and a flimsy trellis will lean or collapse under them.
Next, think about height. Choose a trellis that is as tall as the plant will grow, plus a little extra, because most climbers keep reaching long after you expect them to stop. Then think about placement. Most flowering and fruiting climbers want several hours of direct sun, so set the trellis where light reaches it.
| Build | Best for | Effort | Main materials |
|---|---|---|---|
| Wooden ladder trellis | Peas, beans, clematis, sweet peas | An afternoon | Wood strips, screws |
| Bamboo teepee | Pole beans, cucumbers, sweet peas | Under an hour | Bamboo canes, twine |
| Wall wire trellis | Climbing roses, jasmine, espaliered fruit | A couple of hours | Eye screws, galvanized or stainless wire |
Build One, a Wooden Ladder Trellis
This design looks like a tall ladder. It stands on its own in a bed or can lean against a wall.
You’ll need two uprights cut from 2×2 lumber, around six feet long for a typical bed. Add crosspieces cut from 1×2 strips, and wood screws, a drill, a saw, a tape measure, and a square. Cedar and redwood resist decay naturally and are popular for garden projects. Some gardeners prefer them around edible plants, though pressure-treated lumber is also widely used, so follow the manufacturer’s guidance if you go that route.
- Cut the two uprights to the same length and lay them flat on the ground, parallel, about 18 to 24 inches apart.
- Mark crosspiece positions every 8 to 12 inches along both uprights, starting a foot from the bottom.
- Cut the 1×2 strips to the width between the uprights, plus the width of the wood if you want them to sit on the outside faces.
- Drill pilot holes at each mark so the wood doesn’t split, then screw each crosspiece to the uprights with two screws per end.
- Check that the frame is square by measuring the diagonals. If they match, you’re set.
- Sand rough edges and apply an exterior sealer if you like. Let it dry fully before planting.
To anchor it, drive the bottoms of the uprights 10 to 12 inches into the soil, or screw the frame to the side of a raised bed. In windy spots, add a short stake on each side and tie it off.
Build Two, a Bamboo Teepee
This one is quick and cheap, and it works nicely for annual climbers.
Gather five or six bamboo canes between six and eight feet long. Push each cane 8 to 12 inches into the soil in a circle about two feet across, leaning the tops together. Bind them tightly near the top with strong twine, wrapping several times and finishing with a firm knot. Then wind twine around the canes at intervals of about a foot, pulling it snug at each cane, so the climbers have horizontal rungs to grab.
Leave one gap in the circle if you want easy access for harvesting. Sweet peas, pole beans, and cucumbers all grow well on this shape, and kids tend to enjoy sitting inside a bean teepee in summer. Bamboo lasts a season or two outdoors. At the end of the season, pull it up and store it dry so it holds up longer.
Build Three, a Wire Trellis for a Wall or Fence
A wire trellis is almost invisible, which makes it good for climbing roses, jasmine, and trained fruit trees on a visible wall.
Choose the hardware
Use galvanized or stainless steel wire so it doesn’t rust, and eye screws or heavy-duty wall hooks to hold it. For a brick or masonry wall, drill with a masonry bit and use appropriate wall plugs. For a wood fence or siding, screw directly into solid framing instead of thin boards. Heavier plants need stronger hardware, so size it to the plant, not just the look.
Space and string the wire
Mark rows about 12 inches apart, starting 12 to 18 inches above the ground. Install an eye screw at each end of every row, and add a middle support for longer runs. Use eye screws with enough length that the wire sits two to three inches away from the wall, which gives air room to move around the plant and cuts down on mildew. Thread the wire through one eye, pull it taut by hand, loop it back, and twist it off. Turnbuckles or wire tensioners make it easy to tighten later if the wire sags.
Train the plant
Tie the first shoots loosely to the wire with soft garden twine, fanning them out sideways rather than straight up, since horizontal growth tends to encourage more flowers and fruit. Check the ties each season so they don’t bite into growing stems.
Sizing the Build to the Plant
Dimensions are easier to settle if you work backward from the plant. Check the mature height and spread on the plant tag or seed packet, then add a foot to the height so the top shoots have somewhere to go. For a pair of pea rows, a trellis four to five feet tall is usually plenty. For pole beans and cucumbers, six to eight feet gives them room to keep producing. Width matters less than strength, but a frame that is much narrower than the planted row leaves outer plants without support.
Weight is the other factor. A mature grapevine or wisteria can weigh far more than a bean vine, and wet foliage in a storm adds still more. If you’re unsure, build heavier than you think you need. Thicker uprights, closer fastener spacing, and deeper anchoring cost very little compared with rebuilding a collapsed trellis in midsummer.
Making Any Trellis Last Longer
Seal or stain wood before planting and again every couple of years. Replace twine annually, since it rots. Check screws and eye bolts at the start of each growing season, because plants add weight as they mature. Wire loosens over time, so retighten it in spring.
Where to Place It
Set the trellis where the plant will get several hours of direct sun, and leave room to walk around or reach it for pruning and harvesting. If the trellis stands against a wall or fence, keep it a couple of inches off the surface so air can circulate. In windy yards, place taller structures where a building or hedge breaks the worst of the gusts, or add braces at the base.
Mistakes to Skip
The most common one is building too small. A trellis that fits a young plant usually can’t handle the full-grown vine. Another is placing it in shade and wondering why the plant won’t bloom. Planting too close to the base crowds the roots and invites rot, so leave a few inches between the stems and the frame. Finally, check that wire and twine don’t girdle woody stems as they thicken.
A homemade trellis doesn’t need to be fancy. It needs to be strong enough, tall enough, and in the right spot, and the plants will take care of the rest.